
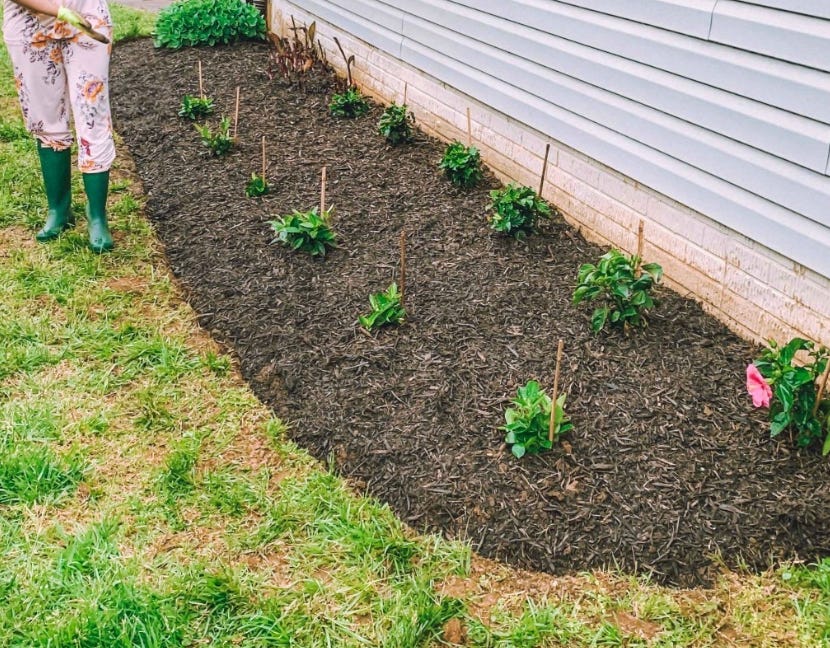
1. Prepping your border
follow along for our garden border installation guide. . . .

How to prep your border.
Now look, let's be honest, we're all fair-weather gardeners and this spring has been pretty brutal. It's been cold and wet, we would normally be prepping our borders a little bit earlier than now, but actually, this is the perfect time to feel garden excited and to get out there and start changing your scene.
If you have a garden that's just grass right now and you're not sure where to start, then read on . . .
So, how do you prep your border? I mean, it is as simple as:
Mark the area of your border
Here are a couple of methods:


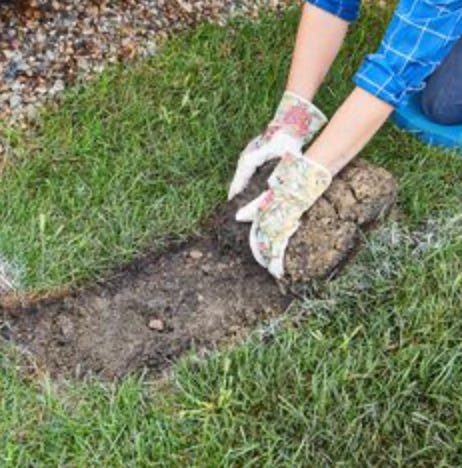
De-turf it!
Drive the spade around that area along the marked line and scrape the turf off. Do not remove too much topsoil; only about five centimetres is needed to remove the turf and its root system.
Now, you can use that! Yes, the removed turf is nitrogen-full, and if you were thinking of a border somewhere else, I would use that turf and place it on the grass where you want to create your border later. Or make a turf heap somewhere discreet to use later.


Place the turf upside down so that it won't grow. It will start rotting down in the area, although it will take a season. All that nitrogen will make up a good topsoil, and it's worth keeping.
Our garden soil is a precious entity that has been evolving for centuries, even if it's clay-based. The turf, with its accumulated nutrients from the grass, is a vital part of this ecosystem. It's essential not to overlook this valuable resource. Let's make a wise choice and not bag it up in bin bags!
Next, you want to fork that over or use a rotovator (you can hire one from a local tool hire).


You can use a fork or a spade, which will require a bit of sweat and muscle! As someone who does this regularly, I know that some soils are good, and some are hard.
Next, after you have dug it over, put some farmyard manure on it and then dig it again! Or add compost to it—anything to start breaking it up and adding organic matter.
Dry soil or very wet soil will be hard to work.
If it's bone dry, water it thoroughly, let it percolate for a few days, and then return to it.
If it's wet, you could de-turf it and let the sun and wind do a bit to dry it out before you start digging.
I would dig it over and then add compost or farmyard manure, FYM, or anything you can to improve that structure.
Then I would leave it, let it settle, wait for a bit of rain and dryness, and then dig it over again to ensure it will be easy for you to plant in.
In the interim, you can go through the Beautiful Border plan:


Start ordering your plants and thinking about how you want your border to face.
It is food for the soul and a great way to start the day by looking out on a beautiful flowering border in the morning, evening or afternoon.
When you're in your kitchen or dining room or looking through your windows and seeing something you've created, flowering and fabulous, you get that satisfying reward of your labour of love and it will be a treat to yourself and your body. You did it!
You can also get someone else to do the hard work for you too though.
I am creating different border aspect designs for you to help make this process manageable, comprehensible, and beautiful. Starting with the Sunny Aspect Border, NEXT, I'll move on to shade, look at clay soils next after shade, and work through understanding your garden.
If you have a buddy you could work this plan together, the power of accountability is real. Next week we will look at planting your border. You can also comment here and I will cheer you on.
Don’t know if you have a South facing border?
listen to last weeks article.
Do you have a shady border?
Well, I've got something coming for you soon, so you can still prep your border ready for the planting plan coming soon.
Love Lucie x x x